Leads Management Mastery
Learn The fundamentals of leads management
Managing Leads
Being able to manage your business's leads in today's fast-paced environment is crucial for keeping a competitive edge. Our robust leads management system allows you to streamline your sales process and drive revenue growth.
If you are already familiar with the page layout and features, head to Section 2: Managing a Lead.
Navigation
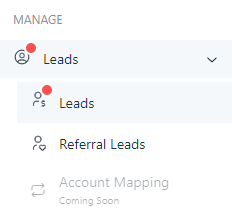
Under the Manage section navigate to Leads -> Leads to open your Leads Management dashboard.
Section 1: Leads Management Overview
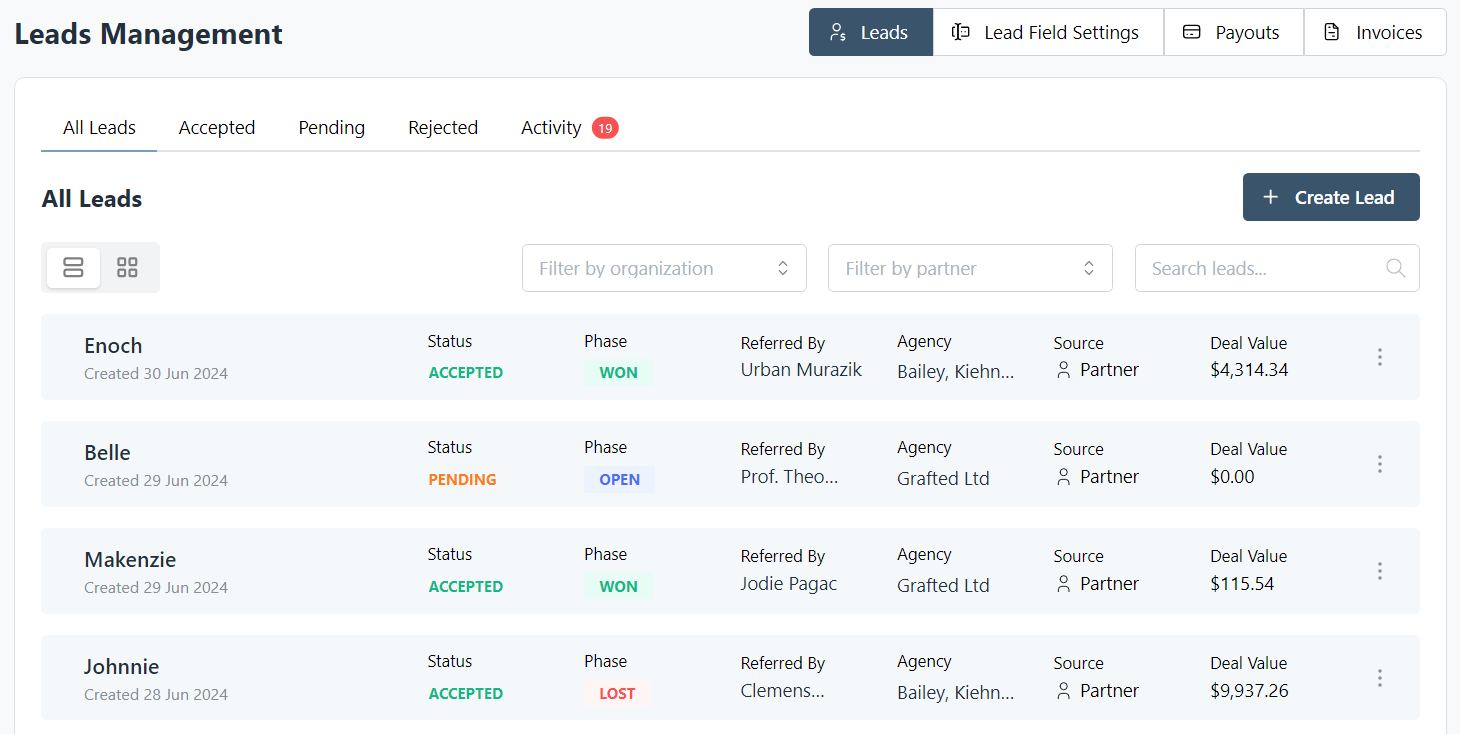
The Leads Management page contains all incoming leads from approved partners. Each individual lead is represented by a row on the page. At a glance, you will be able to see crucial information from the name of the lead to the value of the deal.
In this section, we are going to break down each individual component that makes up this page so you know exactly what everything does!
Leads Page Navigation
At the top of the Leads Management are various related tabs we can navigate to. By default, we are in the Leads tab, which we will cover first.

- Leads (default): View and manage leads.
- Lead Field Settings: Modify the data fields associated with each lead.
- Payouts: View payouts generated from leads.
- Invoices: View invoices generated from leads.
Filtering Leads
At the top of the Leads Management container, you can filter all your leads by Accepted, Pending, Rejected, and Activity Notifications relating to leads.

Leads Layout
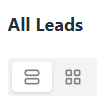
The layout of leads can be changed between row view and card view using the toggle underneath the filter heading.
Searching Leads
Additional filters can be applied using the filters underneath, allowing you to filter by organization, partner, and to search for a specific lead.

Creating a Lead
A button can be found above the additional filters to create your own leads if needed.

A form dialogue will appear asking for the Lead Referrer as well as form details. All the fields marked with a * are mandatory and must be completed. Depending on your display, you might need to scroll the page to see form fields.

Section 2: Managing a Lead
This section will cover exactly what we can do with each individual lead and how we can manage them effectively. A lead is comprised of the following sections from left to right.
- Name: The name of the Lead.
- Created: The Date the Lead was created.
- Status: Indicates if a lead has been accepted, rejected, or is still pending.
- Phase: Indicates if a lead has been won, lost, or is still open.
- Referred By: Who the lead was submitted by.
- Agency: The agency of the user/partner who submitted the lead.
- Source: Specifies the type of user who submitted the lead.
- Deal Value: The monetary value of the deal.

Using the triple dots dropdown at the end of the lead row, we can access more information about the lead by clicking "View", quickly sync it to our CRM of choice, edit the lead, and delete the lead entirely. We're going to click View to see more.

Lead View Page
In a lead's view page, we can see all the details and some useful features. Note you most likely will have to scroll to see all the features this page has to offer.

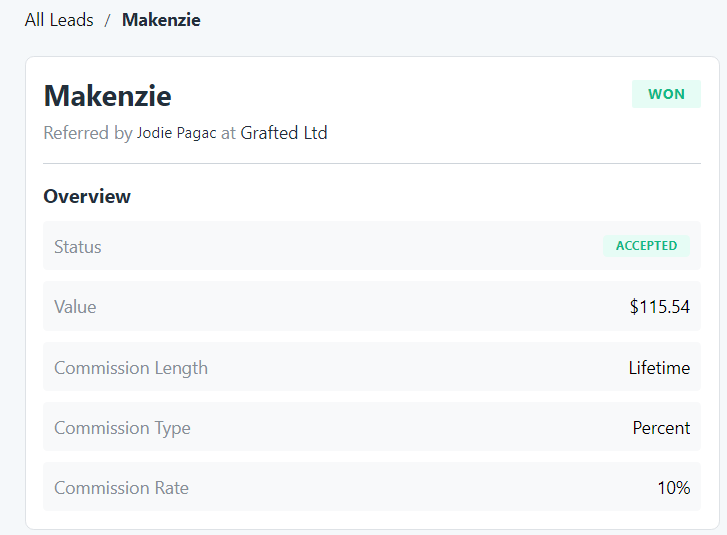
Overview Panel
The Overview panel located in the top left of the page under the breadcrumb provides additional, in-depth information on the lead. To return to the leads dashboard, click All Leads at the start of the breadcrumb.
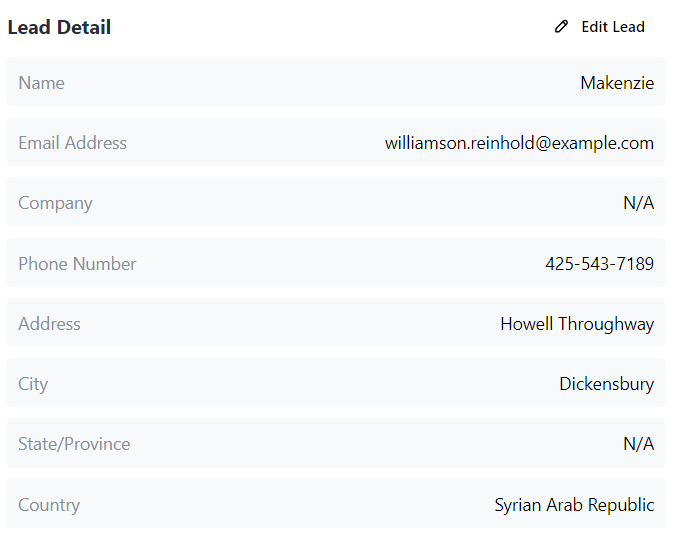
Details Panel
The Details panel located underneath the Overview Panel gives background information on the entities that concern the Lead. These details can be edited at any time in the top right by clicking the Edit Lead button.
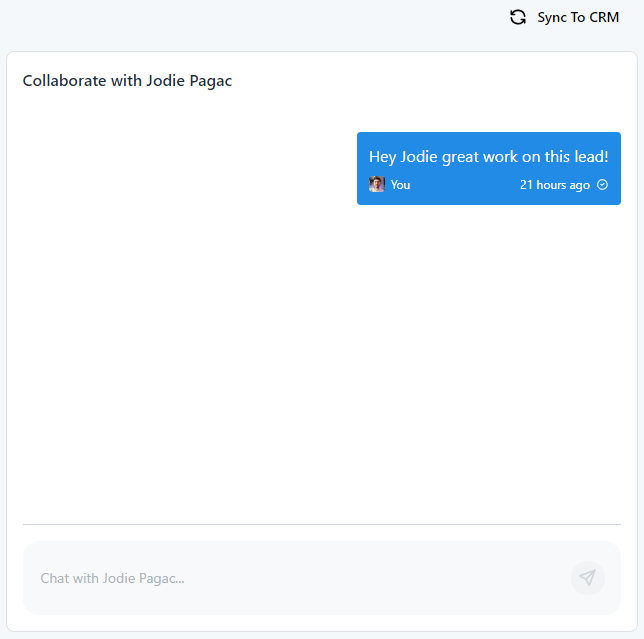
Messages Panel
Located on the right side of the Leads View Page the Messages Panel allows you to directly contact the partner or user who submitted the lead giving you a seamless way to manage specific leads with your workforce.
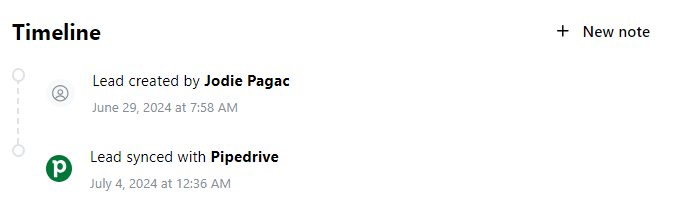
Timeline Panel
Located under the Messages Panel, the Timeline Panel allows you to see the key milestones of the lead, from when it's first created to when the lead is either won or lost. Clicking new note opens a dialogue box for you to add any manual notes to the timeline.
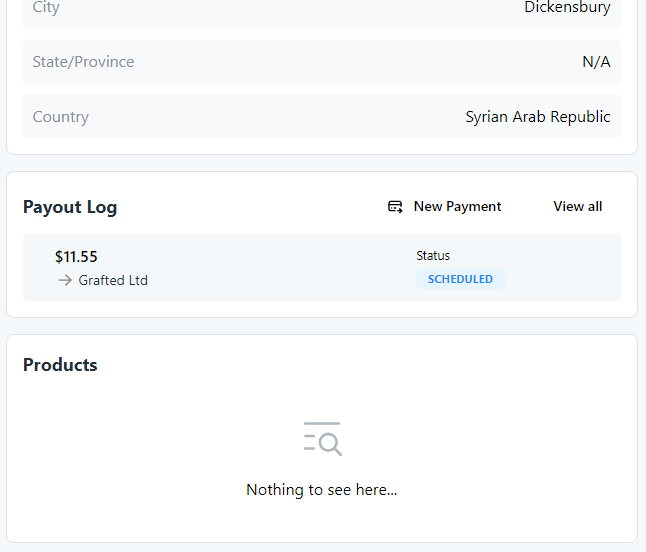
Payout and Products Panel
Located under the Leads Details panel the payout Log shows you exactly what monetary transactions have taken place in relation to the Lead you are viewing.