Automating Tasks Using Flows
Dive into automating your business processes 🤖
Automating tasks can save valuable time and ensure consistency across your business processes. The Flows feature allows you to create automated workflows using actions. This guide will walk you through the process of setting up your first flow and explore the key features.
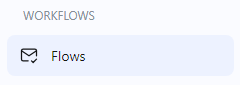
Initial Navigation
To access the Flows feature, navigate to the Workflows tab in the side navigation menu and select Flows.
Flows Page Overview
From the flows page, you can view and edit all your created flows, search for specific flows, and create new ones.

Key Components of a Flow
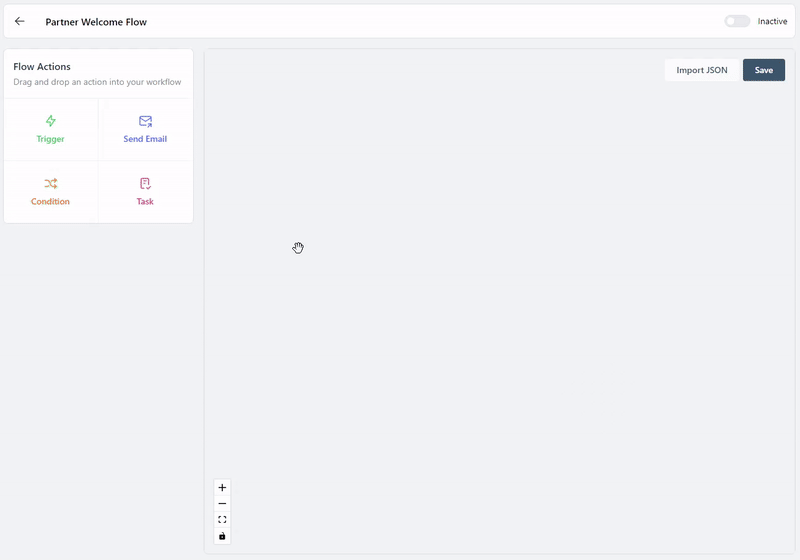
Flow Actions
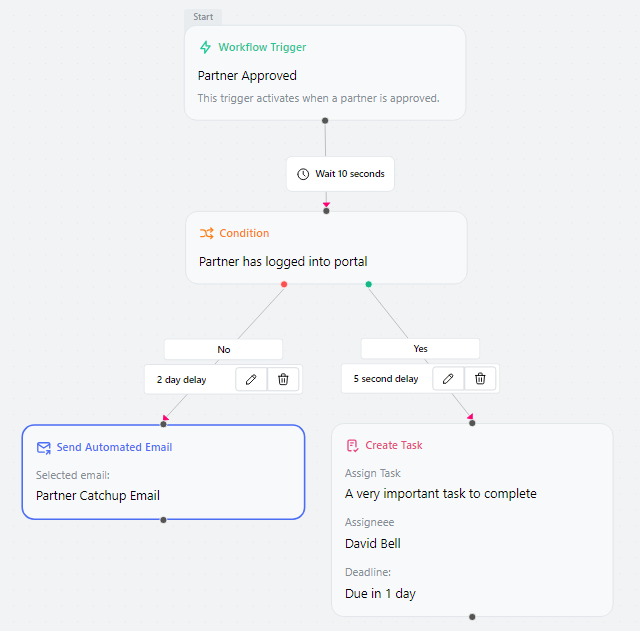
Flow Actions are customizable instructions represented by nodes on a canvas. These nodes can be dragged and dropped, then chained and combined in various ways to automate tasks—like sending emails when partners are approved or recommending a new course after a partner completes one.
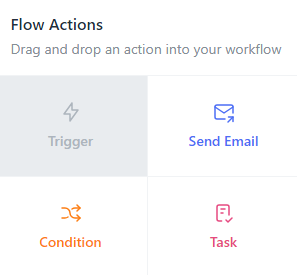
Triggers
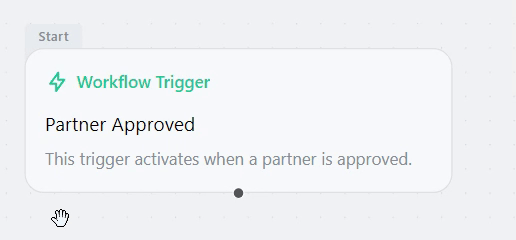
A Trigger is the action that starts the flow. Once a trigger is activated, the workflow begins executing the steps you've configured. There are various triggers to choose from, depending on what automations you would like to run.
Note: Only one trigger can be used per flow and it will always be the starting node.
Available Triggers:
- Partner Approved
- Partner Denied
- Partner Earned a Badge
- Partner Completed a Course
- Lead Referred
- Lead Accepted
- Lead Updated
- Lead Rejected
- Partner Inactive

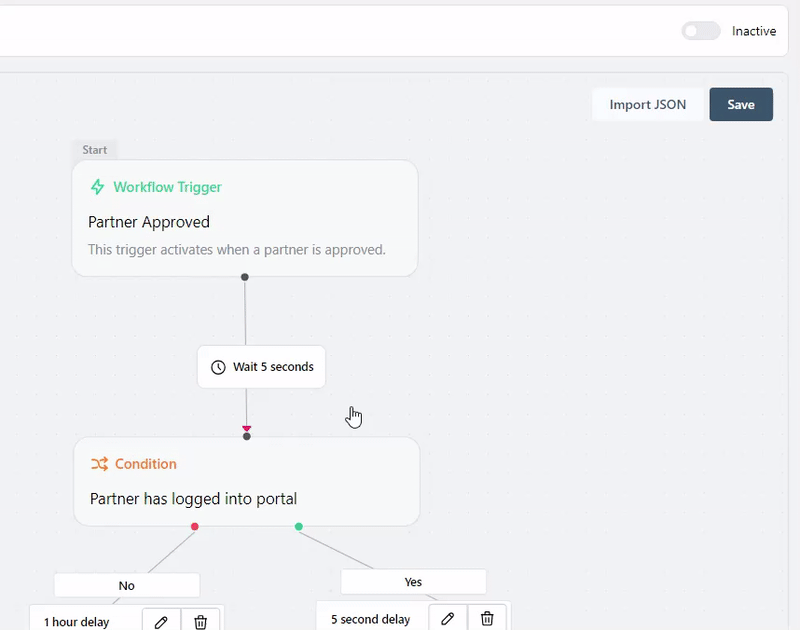
Conditions
Conditions allow you to define specific criteria that must be met before proceeding with the flow. Each condition can use operators to compare values.
Node Outputs
The condition node has green and red outputs which correspond to either the condition being met (green dot) or not met (red dot) when the flow is run.
Available Conditions:
- Partner score
- Partner has logged into portal
- Partner has referred X leads
- Partner deal has been marked as won
Operators like greater than (>) or equals (=) will vary based on the selected condition. For instance, if you choose "Partner score," operators like "greater than" or "equals" will be available.
Tasks
Tasks are actions assigned to team members to perform as part of the workflow. These tasks are fully customisable and can be used to track actionable steps.
Send Email
Send Email actions enable you to send preconfigured email templates to partners or team members
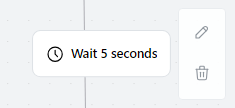
Timing Nodes
Timing nodes are automatically created when paths are created between two action nodes.
Building Your First Flow
Before we get started make sure to select New Flow from the top right of the flows page.
Building a flow will mainly consist of draging and dropping nodes onto the canvas and connecting them to create a chain of actions. Each node will have its own settings menu that can be accessed by hovering over the node, revealing a settings cog and trash can to delete.
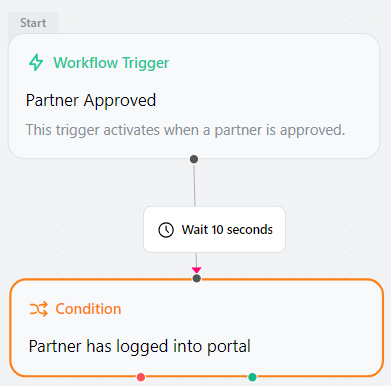
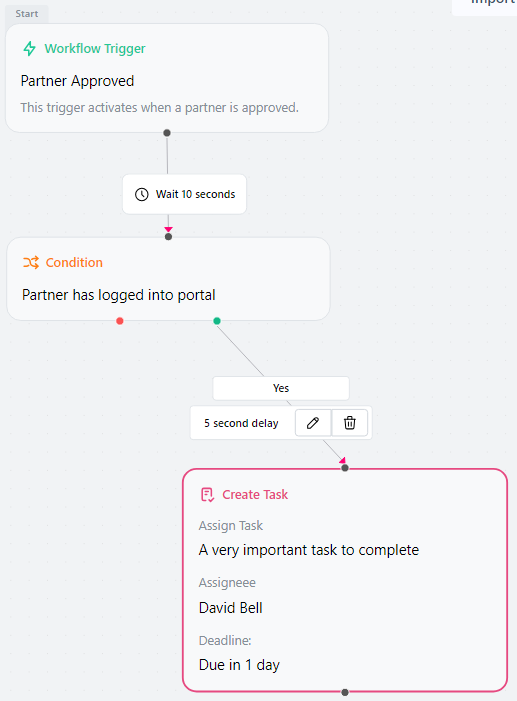
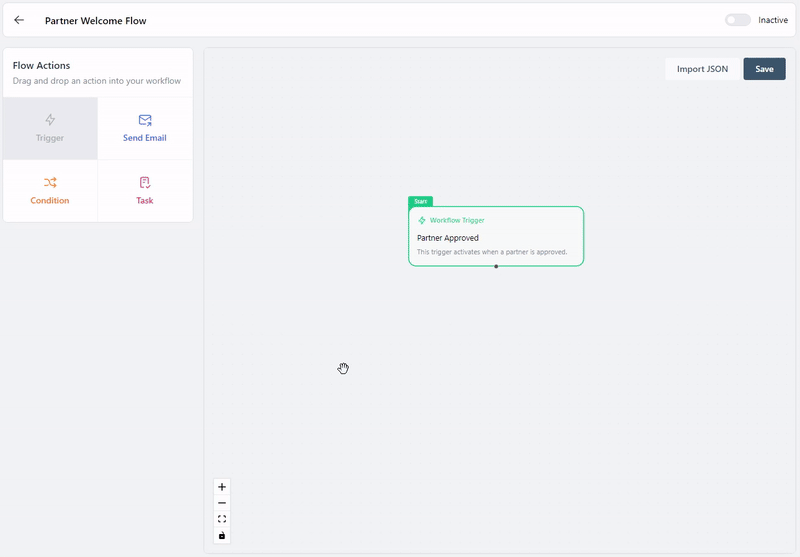
Step 1: Add a Trigger
To start, click and drag the Trigger Action on to the canvas from the Flow Action section. Next, select a trigger from the settings menu. For example, you might choose Partner Approved to start the flow.
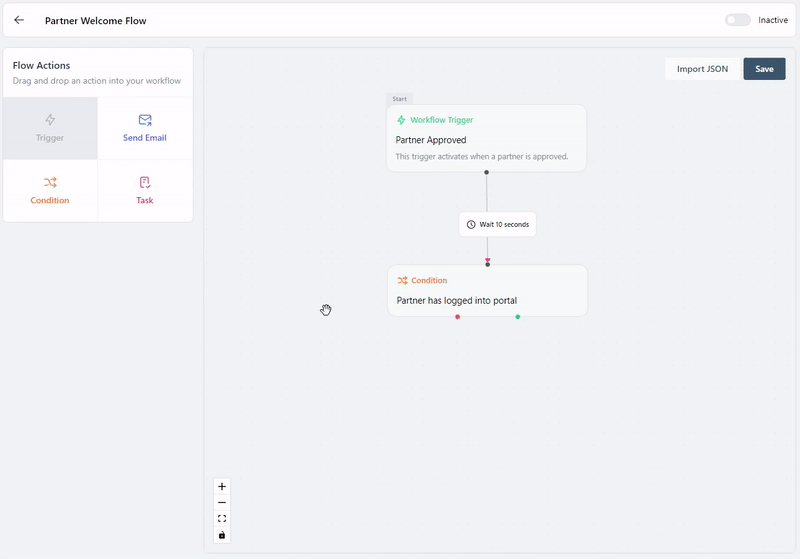
Step 2: Define a Condition
Drag a Condition Action to your canvas and create a link between the trigger node and your newly created condition node.
Configure your condition node to check if the partner is logged in by selecting Partner has logged into portal in the condition node settings.
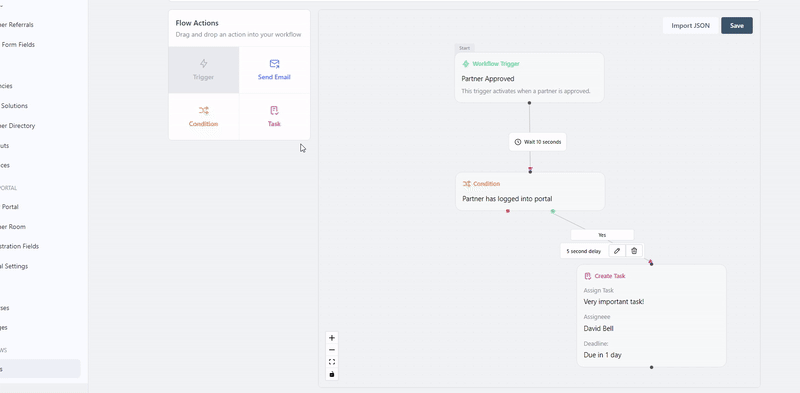
Step 3: Add Task Action
Next, we're going to add a Task Action to our flow. Add a task node to the canvas and configure it as needed in the task node settings. In our example, we are going to assign the task when the condition is met by linking it to our condition's green dot.
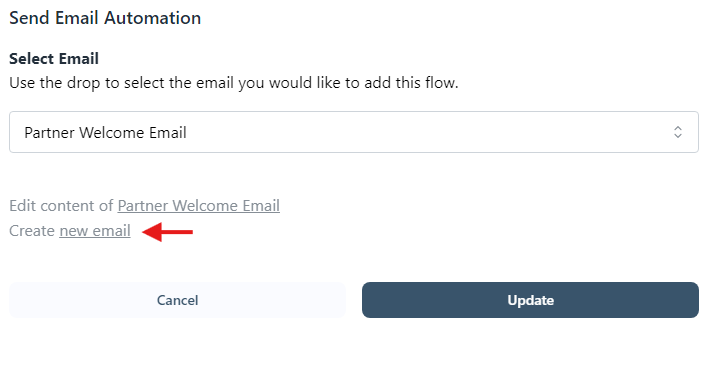
Step 4: Add Email Action
The next part of our flow will be an email action. Drag the Send Email Action onto the canvas and configure it to send an email to the partner. This will send an email to the partner if the condition is not met by attaching it to the red dot on our condition node.
Note:
If you have yet to make an email automation the nodes edit modal contains a redirect link to our email automations page. Check out our guide on creating email automations for further help.
Step 5: Saving & Activating Your Flow
Once the flow is complete, click the slider next to Inactive and click the Save button to wrap up the flow.
Best Practices for Creating Flows
- Ensure Complete Configuration: Make sure all parts of the flow are correctly set up before saving. Missing triggers, conditions, or tasks will prevent the flow from saving and will throw an error.
- Test Your Flow: After creating a flow, test it to ensure everything works as expected.
- Use Conditions for Flexibility: Adding conditions allows your flow to be more specific and adaptable to various business needs.
FAQ
Q: Can I turn off a flow once it has been created?
A: Yes, you can deactivate a flow anytime by setting it to inactive using the toggle switch at the top-right of the flow editor.
Q: Is there a limit to the number of tasks or conditions?
A: Currently, there is no limit, so you can create complex workflows with multiple tasks and conditions.